Thursday, October 31, 2013

Happy Halloween!

Happy Halloween! Each of my nails is a different halloween theme today, for the ultimate Halloween manicure. I am going trick or treating tonight with some cousins even though I'm 15. I think that you can go trick or treating until the end of highschool, but a lot of people think different. What do you guys think?

On my left hand going from thumb to pinkie I have dripping blood, a pumpkin, a mummy, a ghost, and candy. On my right hand I have a really bad black cat, fangs, splattered blood, frankenstein, and a candy corn gradient.


For my right hand I used Elf Desert Haze, Revlon Diva, Sally Hansen Sun Kissed, Sinful Colors Black on Black, NYC French White Tip, and Sally Hansen Mellow Yellow.


For my left hand I used Sally Hansen No Hard Feelings, Sinful Colors Black on Black, NYC White Tip, Revlon Diva, Pure Ice Wild Thing, Sally Hansen Sun Kissed, and Sally Hansen Mellow Yellow.

Thanks for reading! What do you think? If you want, share links to your Halloween nails below. Have a fun and safe Halloween!

Monday, October 28, 2013

Water Marble Tutorial

Okay, I admit it. I have been putting off a water marble tutorial for a LONG time. Truth is, I hate water marbling. It is pretty in the end, but it is a really messy process. But here it is, finally! Here are all the supplies you will need:

  • Cup or container
  • Filtered or bottled water
  • 2 of more polishes
  • Base & Top coat
  • Polish remover
  • Q-tips
  • Toothpicks
  • A lot of time on your hands
Okay, here we go!

Step one: Paint your nails white.

Step two: Fill your cup up with water. Make sure you use filtered or bottled water because it helps the polish spread.

Step three: Take your polish and drip a bit of polish on the water. Get pretty close to the water or the drop will sink to the bottom.


Step four: Keep dropping the polish, alternating colors.


Step five: Take your tooth pick and lightly drag it against the polish making whatever design you like.

Step six: This step is optional but if you put tape over your finger (not the nail) then clean up will be much easier.

Step seven: Dip your nail over the design you like and keep it there.


Step eight: With your finger still in the water, take your tooth pick and swirl it in the water to get all the excess polish then pull your finger out. 


Step nine: Take the tape off and clean up with your acetone and Q-tips. Then put top coat on and your done!

Thanks for reading! If you have any questions or comments, let me know in the comment box!

Saturday, October 26, 2013

Sally Girl- U Glo Girl, Sweet Deceit, and Dare U

Hey there! In my process of redecorating the blog, I did the tutorials page today! Go check it out, its pretty fancy. So on Thursday I went to Sally Beauty Supply and got three Sally Girl polishes. If you don't know about them, they are all a dollar and they have a pretty good selection. Even though the bottles are pretty small. So here is U Glo Girl, Sweet Deceit, and Dare U (The names literally have the "U" in them, I'm not just being lazy).

U Glo Girl-

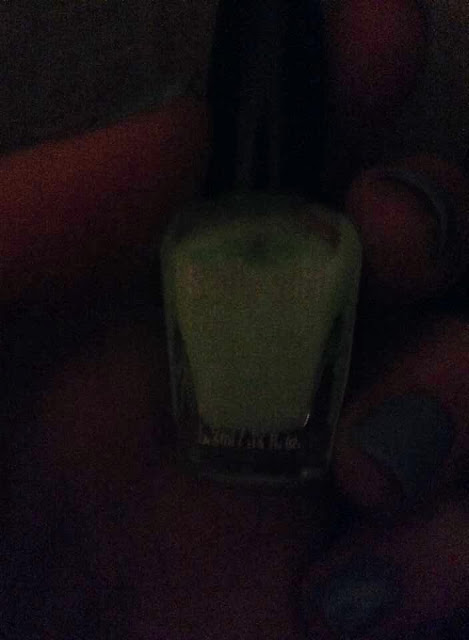
U Glo Girl is a glow in the dark top coat. This polish glows great and everything but my camera doesn't really want to pick it up. But I tried anyways. Here is U Glo Girl over 2 coats of Elf Mint Cream.


Sweet Deceit:

Sweet Deceit is a shimmery gold top coat. By looking at the bottle, it looks like a little pink and gold shimmer. But its not. This polish could never go by itself. So I put it over Elf Wedding Bells. I actually really like this one. Here is 2 coats over 3 coats of Wedding Bells.


Dare U:

Dare U is a glittery top coat. There is mostly blue, green, and purple glitter in this one. But if you move it around you can see some gold in there too. I love this one, I honestly have nothing like it. I put it over Elf Skinny Jeans. Here is 2 coats over 2 coats of Skinny Jeans.


Which one is your favorite? Tell me in the comments! You can get these only at Sally Beauty Supply.

Friday, October 25, 2013

Half of China Glaze Metal Crackle Collection Swatches & Review

Hey! Do you like the pretty new design of the blog? I worked on it for at least 2 hours last night. I think its a lot more simple and pretty. There are some new features with the design.
  • Reactions- by the bottom of the preview, an easy way to tell me what you think!
  • Social Media Icons- I had social media widgets before but these are so much more pretty and professional!
  • Contact/PR- I added a contact and PR section to my about me page. The contact has my email!
So today I have half of the China Glaze Metal Crackle collection today for you! There was a sale going on at big lots, they were $1.80 a piece! So yes, I freaked out and bought all 3 of them. I have Cracked Medallion, Latticed Lilac, and Oxidized Aqua. I put all of these over Sinful Color's Black on Black.

Cracked Medallion:

Cracked Medallion is a bronze crackle polish. This one is really pretty and it cracked really well.


Latticed Lilac:

Latticed Lilac is light purple crackle polish. This one crackled really well but I'm not a big fan of the color.


Oxidized Aqua:

Oxidized Aqua is an aqua blue crackle polish. This one is my favorite of them all. It doesn't crackle really great but the color is so pretty.


Wednesday, October 23, 2013

Hospital & Nail Art

Hey there! Coming to you from the hospital. Again. I had some really bad stomach pains yesterday form my surgery. So they are trying to figure out what is going on. Then I just threw up not too long ago. So they might be doing some more tests soon. 

Luckly for me, I have a few posts prepared in advance. They first one is some nail art. I tried to combine some berry colors and gold. I like how they turned out for the most part. 


Monday, October 21, 2013

Elf 12 Piece Set Swatches & Review

Hey! Today I have 8 new elf polishes for you! The set originally came with 12 but I have already made another post on 4 of them. If you want to see Gina Girl, Sea Escape, Nude, and/or Smokin Hot' go here.

Wedding Bells:

Wedding Bells is a very light pink. The formula was good and I love this color. It is so subtle and pretty. I did have to use 4 coats though. But that is pretty expected for a polish as light as this one. Here is 4 coats with no top coat.


Gold Star:

Gold Star is a clear base with small and large gold hexagonal glitters. I put this one over Wedding Bells. This glitter is really pretty but the glitter is kind of sparse. Here is 2 coats over 4 coats of Wedding Bells with no top coat.


Desert Haze:

Desert Haze is a darker tan or a light brown. The formula of this color is pretty good but the color is kind of blah. But its always good to have more nudes. Here is 2 coats without top coat.


Prissy Chrissy:

Prissy Chrissy is a light brownish orange. This color is unlike anything that I have in my collection. Its one of my favorites of the set actually. I love oranges and this is a great halloween color. The formula is great too. Here is 2 coats without top coat.


Blush:

Blush is a light bronze foil. This is other one that I really don't have anything like it. The formula is good. Here is 2 coats without top coat.


Raspberry Sorbet:

Raspberry Sorbet is a dark pink creme. The name is actually perfect for this one because it is a lot like a raspberry color. The formula is good and the color is really vibrant. Here is 2 coats without top coat.


Purple Pleaser:

Purple Pleaser is your typical plum creme. I like this color but its not very original. The formula is pretty good. Here is 2 coats without top coat.


Purple Dream:

Purple Dream is a purple and pink shimmer. Honestly, I have at least 3 polishes exactly like this one. But its still pretty. Here is 2 coats without top coat.


So what are your thoughts on these pretty polishes? Let me know in the comments below! Thanks for reading.

 
Copyright © 2014 A Polished Bookworm