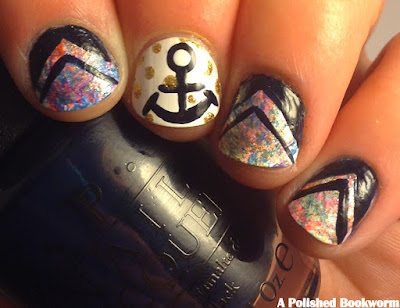
Tutorial: Anchor Nail Art
Hey guys! I have spent so much time blogging about books lately and it's time to get some balance in here. So today I have a nail art tutorial for you. I have been trying to make more tutorials lately because people typically like them better then just a regular post. You will probably see more tutorials coming in the following months. Today I wanted to bring you a tutorial appropriate for summer: an anchor tutorial!
What You Will Need:
- A dark navy blue polish. I'm using O.P.I. Incognito in Sausalito
- A white polish. I'm using NYC French White Tip.
- A gold polish. I'm using China Glaze Mingle with Kringle.
- A dotting tool (You can also use a bobby pin or a pencil!)
- A nail art brush or any small paint brush.
- Top coat. I'm using Seche Vite.
- Glue or liquid latex. This is totally optional. You see all that gooey stuff on my fingers? That's glue for easier clean up. So when its dry I just peel it off.
- Clean up brush and nail polish remover.
Step One:
1. Paint your nails white and place a big dot on your nail as shown above.
Step Two:
2. Place a smaller dot with white in the middle of your navy dot.
Step Three:
3. Paint a "t" coming off of your circle. All you are really doing is painting a line down from your circle and then painting another in the middle of that line.
Step Four:
4. Paint a curve at the bottom of your nail connecting to your line. Then paint two lines on both sides of the curvy line. It kind of looks like a smiley face.
Step Five:
5. Use your dotting tool to make gold dots all around your nail. You can see that some of my dots go over the anchor but if you don't want that it's fine! To fix that you could go over part of the dot, where the line should be, with your navy polish.
6. Clean up around your cuticles and finish with top coat!
If you have any suggestions for new tutorials please leave them in the comments! Thanks for reading and if you recreate this anchor with my tutorial feel free to show me on any of my social medias.


0 comments:
Post a Comment